VMware NSX Edge SNAT vs DNAT
VMware NSX Edge SNAT vs DNAT – In this blog we would be looking at the differences between SNAT and DNAT and also look at ways to automate their configuration using PowerShell and NSX API’s.
Lets look at the two types of NAT, which are SNAT (Source NAT) and DNAT (Destination NAT)
SNAT
SNAT or Source NAT allows us to change the source IP address of a network packet to another IP Address. although it does not allow us to change the destination IP address.
Using SNAT allows us to get improved security as we can use Private IP addresses, it helps in masking or hiding the IP of the device which is the requestor.
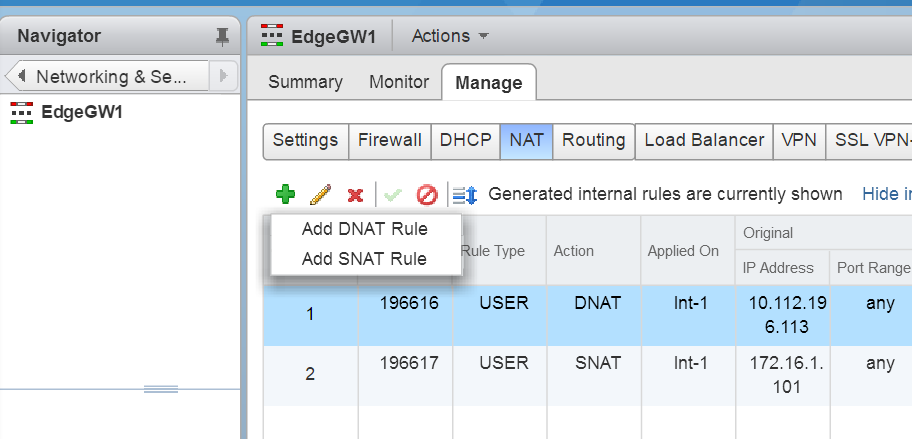
Ok so lets create an SNAT address using GUI and also look at ways to create it using API call.
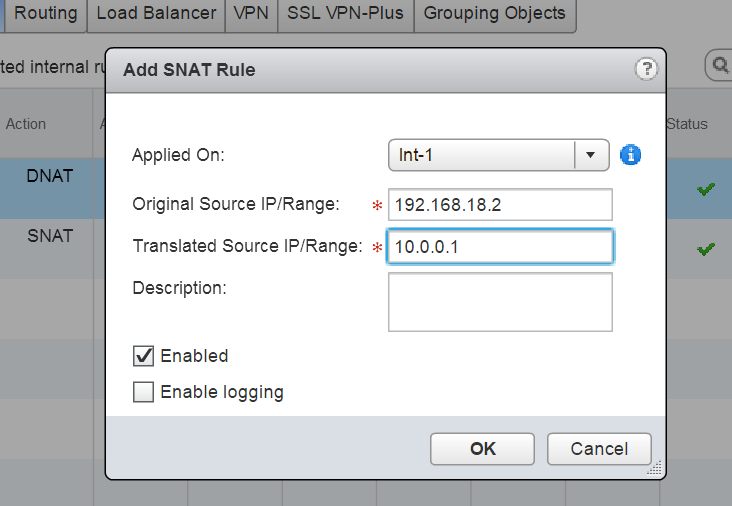
Head over to the NSX edge, click on NAT and select add SNAT rule.
and enter in the required parameters and click on ok.
DNAT
DNAT or Destination NAT is used to translate the destination ip address of an network packet to another ip address, DNAT does not allows to change the source ip address, so lets take a scenario when a user accesses an internal application. Using DNAT we can hide the internal IP address of the application and substitute another IP for it and hence is more secure.
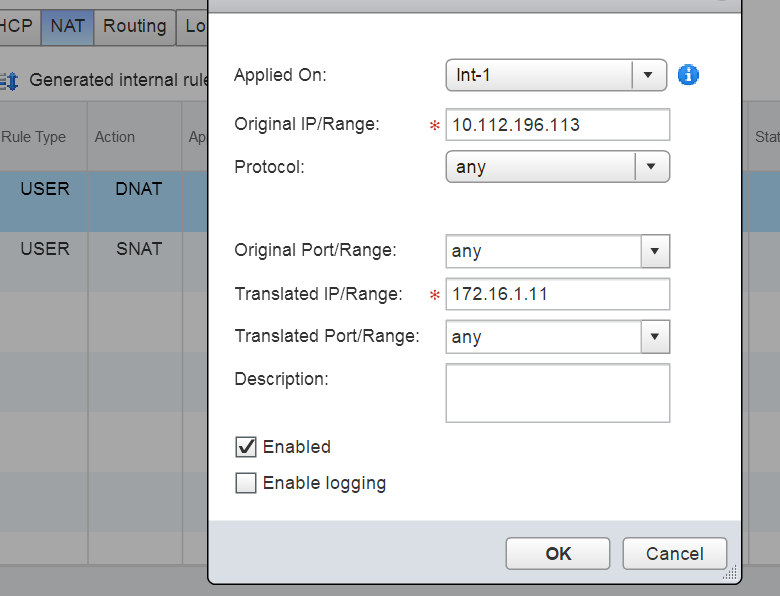
Creating a DNAT is similar to the way we created a SNAT, head over to the location identified on the above location and select add DNAT rule.
Now lets look at ways to create this using PowerShell and NSX APIs, unfortunately i was unable to find the cmdlet for this in PowerNSX hence i resorted to the old fashioned way of invoking the APIs using Invoke-WebRequest cmdlet.
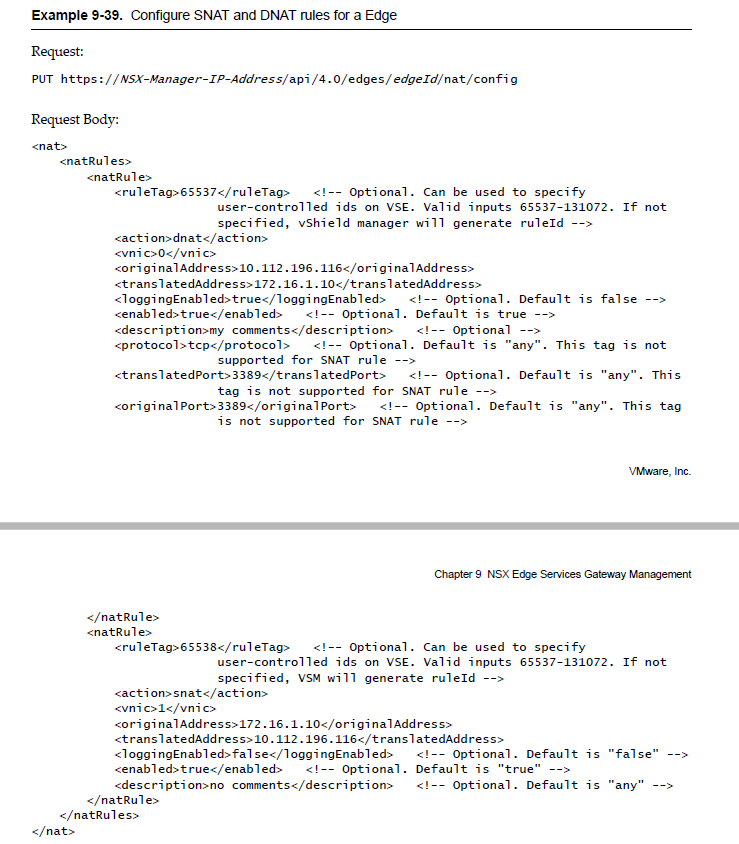
Now if we look at the NSX API guide, we see the below body and PUT method to create SNAT / DNAT.
Now lets create a sample code based on the above syntax and invoke it using PowerShell.
### Add a SNAT / DNAT rule


$Request = "https://192.168.18.131/api/4.0/edges/edge-6/nat/config"

$Username = "admin"
$Password = "vmware1!"
### Ignore TLS/SSL errors

add-type @"
    using System.Net;
    using System.Security.Cryptography.X509Certificates;
    public class TrustAllCertsPolicy : ICertificatePolicy {
        public bool CheckValidationResult(
            ServicePoint srvPoint, X509Certificate certificate,
            WebRequest request, int certificateProblem) {
            return true;
        }
    }
"@
[System.Net.ServicePointManager]::CertificatePolicy = New-Object TrustAllCertsPolicy

### Create authorization string and store in $head
$auth = [System.Convert]::ToBase64String([System.Text.Encoding]::UTF8.GetBytes($Username + ":" + $Password))
$head = @{"Authorization"="Basic $auth"}


$body = "<nat>
<natRules>
<natRule>
<action>dnat</action>
<vnic>0</vnic>
<originalAddress>10.112.196.113</originalAddress>
<translatedAddress>172.16.1.11</translatedAddress>
</natRule>
<natRule>
<action>snat</action>
<vnic>0</vnic>
<originalAddress>172.16.1.101</originalAddress>
<translatedAddress>10.112.196.117</translatedAddress>
</natRule>
</natRules>
</nat>"


try {
        $result = Invoke-WebRequest -Uri $Request -Headers $head -ContentType "application/xml" -Method PUT -ErrorAction:Stop -Body $body
}
catch {
       $result = $_.Exception.Response.GetResponseStream()
        $reader = New-Object System.IO.StreamReader($result)
        $responseBody = $reader.ReadToEnd();
 }

 $responseBody
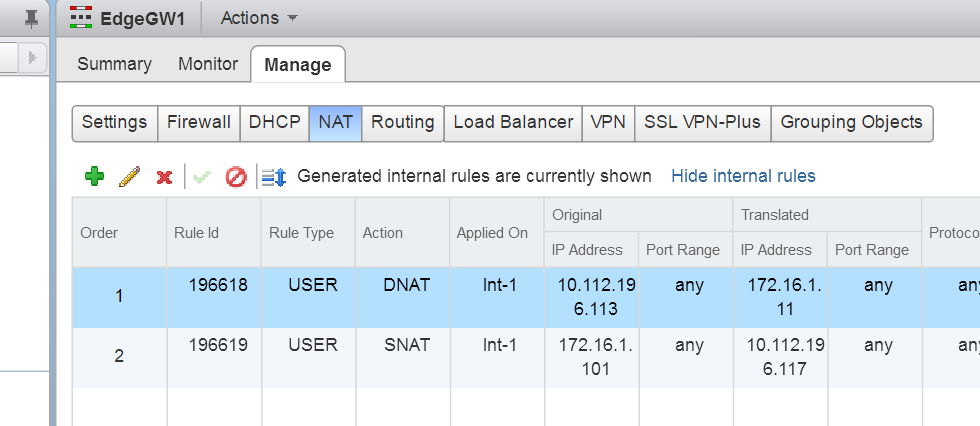
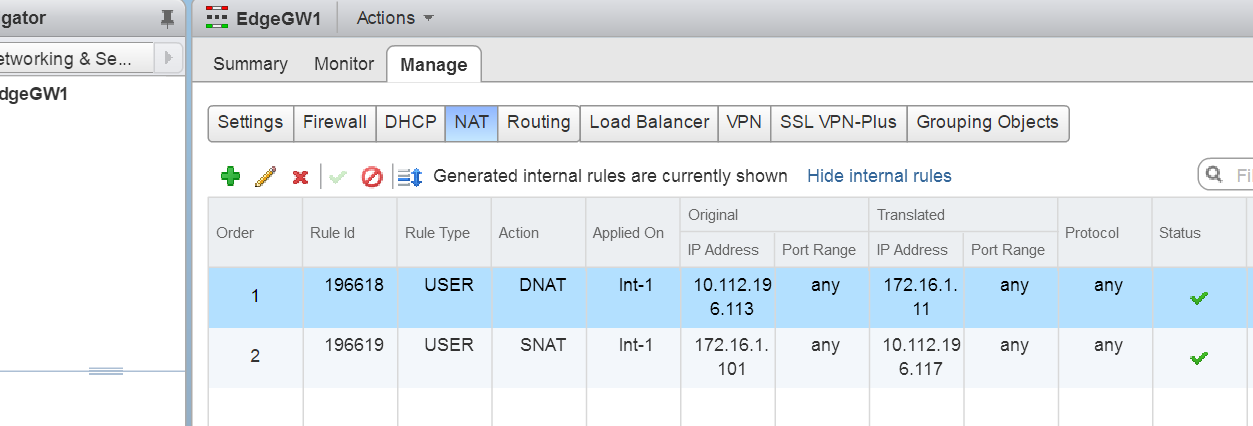
As you can see in the above request, we are creating both a SNAT and DNAT rule.
Now if i refresh my vSphere Web-client i would be able to see the rules created.
Similarly i can also query for these Rules using the QUERY request, another look at the API guide shows that to query the rules i need to execute.
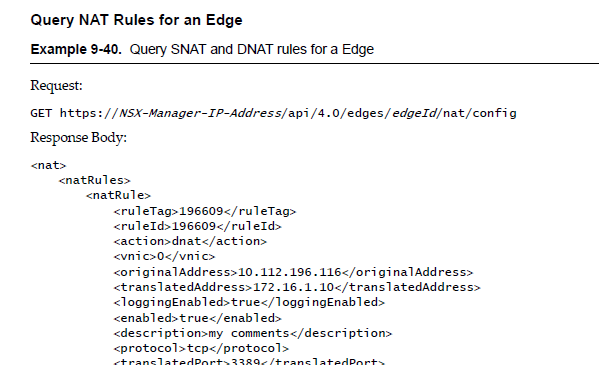
Lets implement this code in PowerShell and invoke this API call.
################### Query SNAT/DNAT Rules ###################
$Request = "https://192.168.18.131/api/4.0/edges/edge-6/nat/config"
$Username = "admin"
$Password = "vmware1!"
### Ignore TLS/SSL errors
add-type @"
using System.Net;
using System.Security.Cryptography.X509Certificates;
public class TrustAllCertsPolicy : ICertificatePolicy {
public bool CheckValidationResult(
ServicePoint srvPoint, X509Certificate certificate,
WebRequest request, int certificateProblem) {
return true;
}
}
"@
[System.Net.ServicePointManager]::CertificatePolicy = New-Object TrustAllCertsPolicy
### Create authorization string and store in $head
$auth = [System.Convert]::ToBase64String([System.Text.Encoding]::UTF8.GetBytes($Username + ":" + $Password))
$head = @{"Authorization"="Basic $auth"}
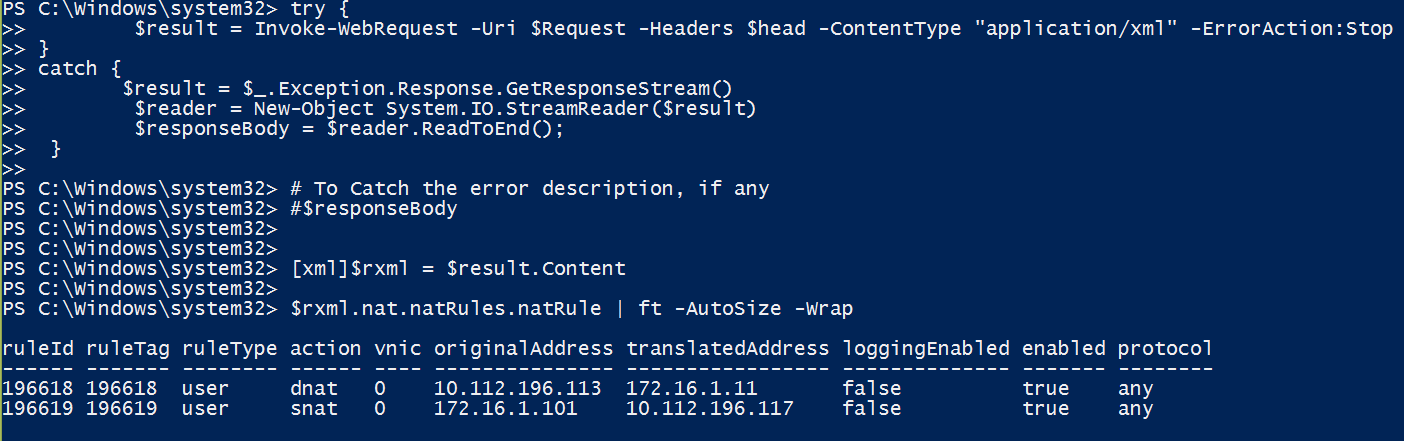
try {
$result = Invoke-WebRequest -Uri $Request -Headers $head -ContentType "application/xml" -ErrorAction:Stop
}
catch {
$result = $_.Exception.Response.GetResponseStream()
$reader = New-Object System.IO.StreamReader($result)
$responseBody = $reader.ReadToEnd();
}
# To Catch the error description, if any
$responseBody
[xml]$rxml = $result.Content
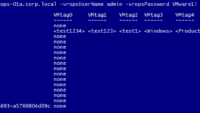
$rxml.nat.natRules.natRule | ft -AutoSize -Wrap
Once we execute the above code, you would be able to see the rules displayed on your screen.
I hope this blog was helpful and translates to some real world scenarios to use PowerNSX .
Do check out some of my other Posts on NSX
- VMware NSX PowerShell Installation and System Requirements Part-1.
- VMware NSX : Why we need it in SDDC.
- VMware NSX Components & Architecture
- Vmware NSX Controller Cluster creation using PowerShell
- VMware NSX Logical Switch and DLR config GUI-API
- Getting Started with PowerNSX
- VMware NSX Edge Static vs Dynamic Routing – PowerShell Config
- VMware NSX Edge SNAT vs DNAT – PowerShell Config