Managing Linux with PowerShell DSC
Managing Linux with PowerShell DSC – After some hard struggle, we know that success will finally come through. This is what happened when me “A pure windows guy” started testing out DSC for Linux.
In this blogpost i would share my experiences on my tests with PowerShell for DSC with Linux so that it can help out folks trying the similar stuff.
Ok so lets get into what is exactly PSDSC for Linux, its a set of resources provided by Microsoft which allows you to manage your Linux VM’s using PowerShell DSC, the similar way we author DSC configuration we can create configs for managing Linux Infrastructure too.
So let me get right into the details.
To start with i had a Test VM built with CentOS 6.6 OS as you can see in my vCenter console below.
Using a set of OSCustomization specs available i configured an IP, Hostname for this vm at the time i deployed it, and i used as always PowerCLI 🙂 for this deployment too.
Next i enabled a ssh session to the vm via Putty and ran the below set of commands to install the necessary packages which consist of perl modules, OMI server and the PSDSC Package.
# YUM to install the required pre-requisites
yum -y groupinstall 'Development Tools'
yum -y install pam-devel
yum -y install openssl-devel
yum -y install python
yum -y install python-devel
yum -y install libcurl-devel

# Next download and install the latest version of OMI server v 1.0.8.2
mkdir /root/downloads
cd /root/downloads
wget wget https://collaboration.opengroup.org/omi/documents/33715/omi-1.0.8.tar.gz
tar -xvf omi-1.0.8.tar.gz
cd omi-1.0.8
./configure | tee /tmp/omi-configure.txt
make | tee /tmp/omi-make.txt
make install | tee /tmp/omi-make-install.txt


# Next download and install the latest PSDSC for Linux v 1.1.0-466, at the time of this post
cd /root/downloads
wget https://github.com/Microsoft/PowerShell-DSC-for-Linux/releases/download/v1.1.0-466/PSDSC.tar.gz
tar -xvf PSDSC.tar.gz
cd dsc/
mv * /root/downloads/
cd /root/downloads
./configure && make
make reg
Next we need to start the OMI server using the below set of commands.
OMI_HOME=/opt/omi-1.0.8
/opt/omi-1.0.8/bin/omiserver -d
Also note rather than implementing the above steps of downloading and installing the packages you can also download the .rpm files for the same from PowerShell Desired State Configuration for Linux
Here’s a sample view of the commands to install the rpm files.
957 2016-01-13 03:19:45 sudo rpm -Uvh omi-1.0.8.ssl_100.x64.rpm
958 2016-01-13 03:20:06 sudo rpm -Uvh dsc-1.1.0-466.ssl_100.x64.rpm
Note :- Rather than doing this manually over the linux putty session, you can save the above set of commands to a configureDSC.sh file and use the Invoke-VMScript cmdlet to call them.
Invoke-VMScript -VM $VMname -ScriptText "sh /root/configureDSC.sh" -GuestUser $linuxuser -GuestPassword $linuxpassword
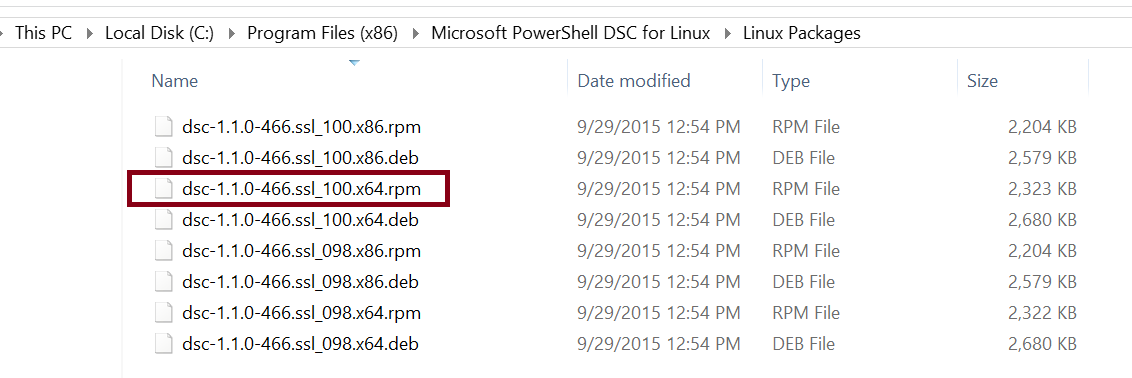
The above link would allow you to download an MSI package which when installed would create the necessary folder structures and place the .rpm files and the PSDSC modules.
Here’s a view of the folder structure.
For one of my another testing scenario with only the rpm packages i used the below file
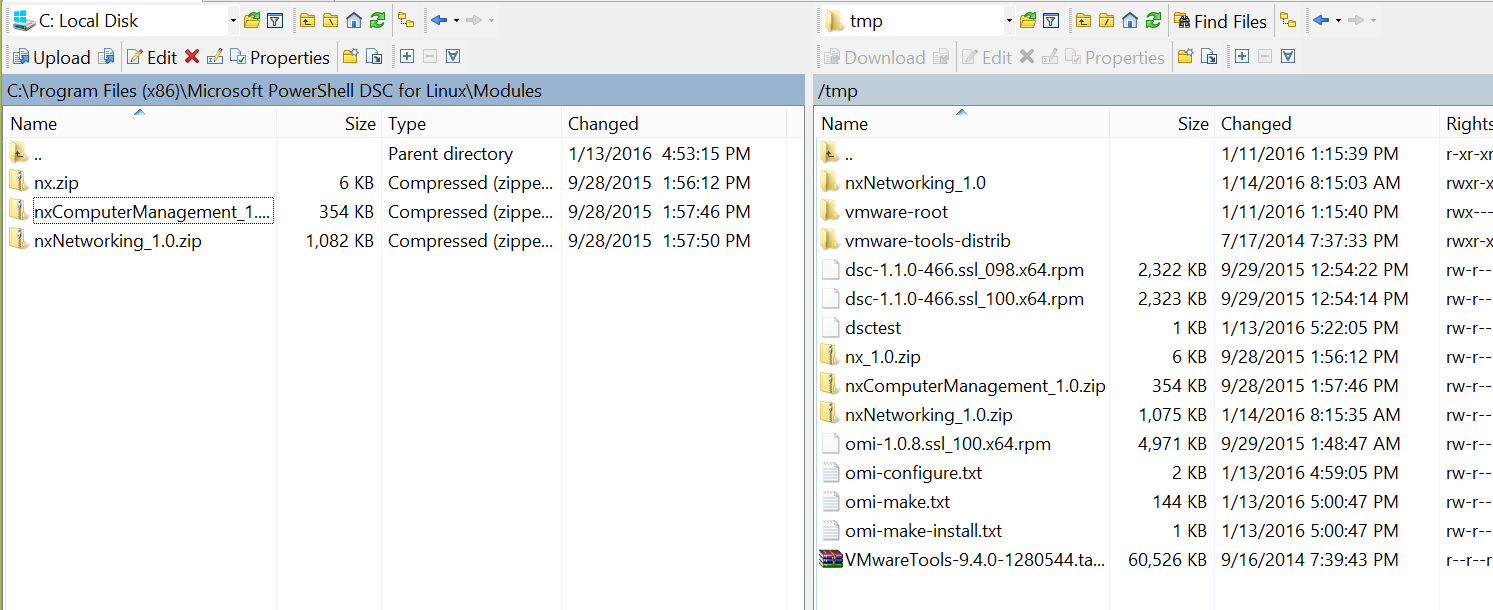
Also here the view for the modules itself.
Once we have all the files , next i used WinSCP to copy over the files to the /temp location of my Linux VM.
Here’s again when PowerCLI would come to your rescue, you can use the Copy-VMGuestFile cmdlet to copy over these files to the linux VM
Copy-VMGuestFile -Source "C:\Program Files (x86)\Microsoft PowerShell DSC for Linux\Modules\nxComputerManagement_1.0.zip" -Destination "/tmp" -VM $vmname -LocalToGuest -GuestCredential $gcredential
Once the above steps are completed, i went ahead and installed the modules. using the below set of commands on my linux vm.
unzip nxComputerManagement_1.0.zip
cd nxComputerManagement_1.0
zip -r nxComputerManagement_1.0.zip nxComputerManagement/*
cp nxComputerManagement_1.0.zip /tmp/
sudo /opt/microsoft/dsc/Scripts/installModule.py /tmp/nxComputerManagement_1.0.zip

unzip nxNetworking_1.0.zip
cd nxNetworking_1.0
zip -r nxNetworking_1.0.zip nxNetworking/*
cp nxNetworking_1.0.zip /tmp/
sudo /opt/microsoft/dsc/Scripts/installModule.py /tmp/nxNetworking_1.0.zip
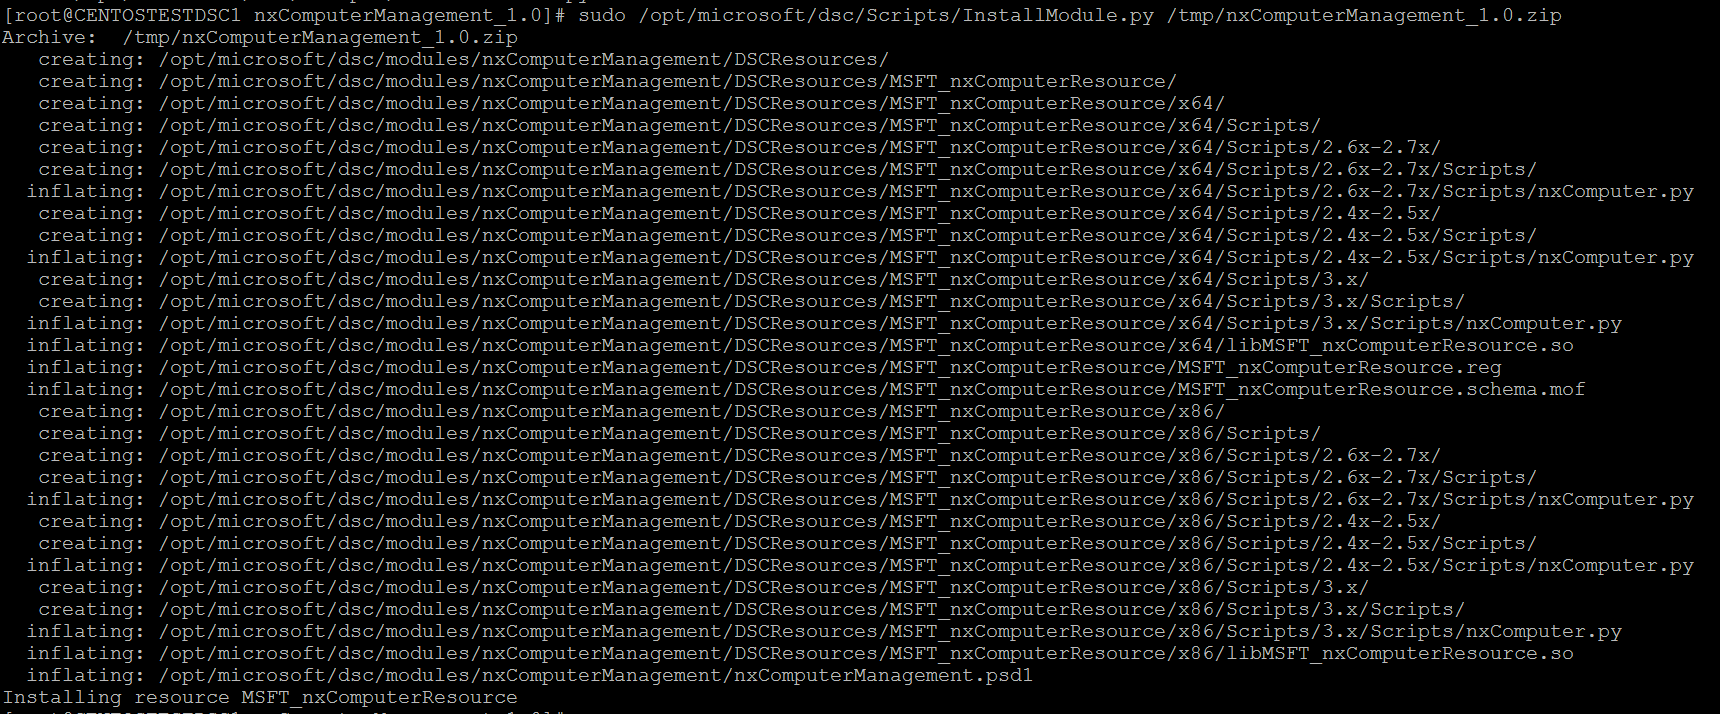
Here’s a screencapture from my linux box
Once all the steps are done, lets start building our configuration on the windows vm to test this configuration 🙂
Note that you need to install all the required nx modules on your server/desktop too.
You can do this by heading over to PowerShellGallery to download and install the resource using the
Install-Module cmdlet.
Here’s a view of all nx DSC resources i have on my laptop.
Now we are all set, lets build the configuration.
Heres the script block which consists of my sample configuration also the DSC Push cmdlet “Start-DSCConfiguration” to push the mof files across my linux VM’s.
#DNSDomainName = "test.com"

Configuration MyDSCDemo {

   Import-DSCResource -Module nx
   Import-DSCResource -Module nxComputerManagement
   Import-DSCResource -Module nxNetworking

   Node "Your Linux VM IP / HostName here" {

        nxFile myTestFile {

            Ensure = "Present"
            Type = "File"
            DestinationPath = "/tmp/dsctest"
            Contents="This is my DSC Test!"

        }

        nxUser WebAdmin {
            Ensure = 'Present'
            UserName = 'webadmin'
            FullName = 'Web Admin'
            Password = 'test'
        }

        nxUser WebAdmin1 {
            Ensure = 'Present'
            UserName = 'webadmin1'
            FullName = 'Web Admin1'
            Password = 'test'
        }

       nxComputer ComputerSettings{
	   Name = "CENTOST"
	   TimeZoneName = "Asia/Calcutta"
	}

        nxService FWD{

            Name = "httpd"
            Enabled = $true
            State = "Running"
            Controller = "init"

        }


    }
}

Set-Location C:\scripts
MydscDemo

$Credentials = get-credential root

$CimOptions = New-CimSessionOption -SkipCACheck -SkipCNCheck -UseSsl -SkipRevocationCheck

$CimSession = New-CimSession -Credential $Credentials -ComputerName "Your Linux VM IP / HostName here" -port 5986 -Authentication Basic -SessionOption $CimOptions

Get-CimInstance -CimSession $CimSession -namespace root/omi -ClassName omi_identify

Start-DscConfiguration -CimSession $CimSession -wait -Verbose -Path C:\scripts\MyDSCDemo

Get-DscConfiguration -CimSession $CimSession

Test-DscConfiguration -CimSession:$CimSession
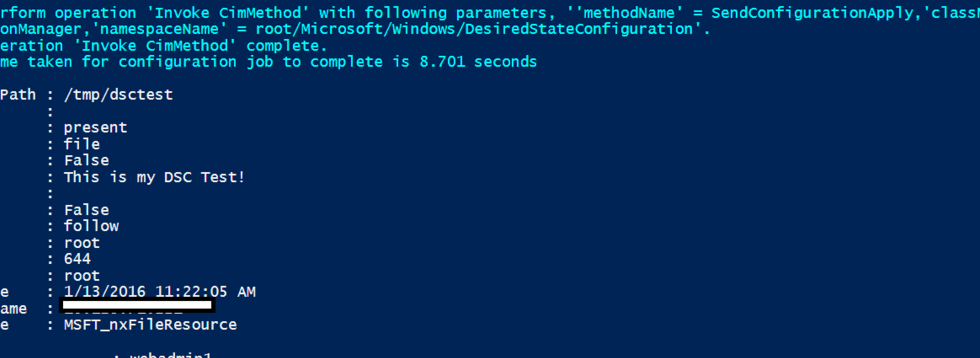
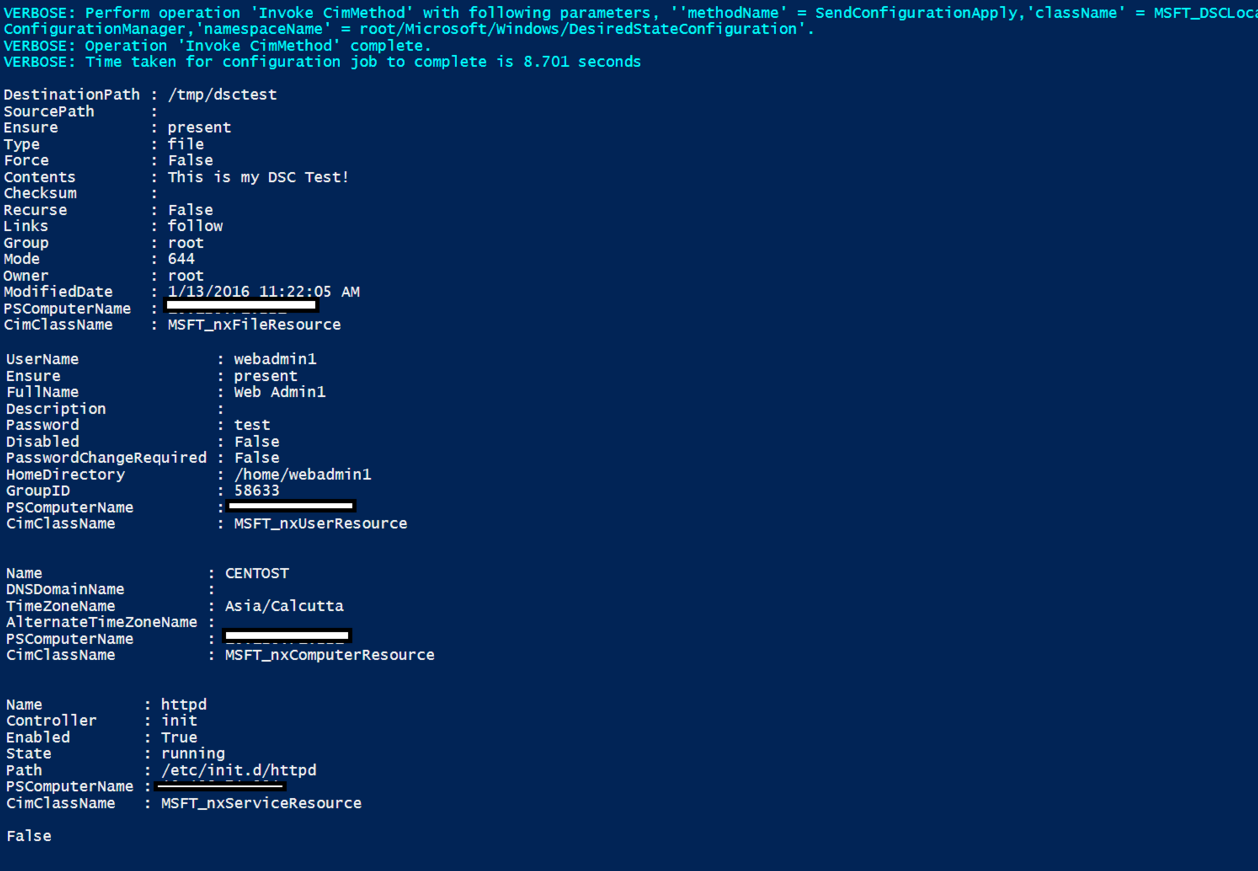
Once you run the above configuration, you would see the configurations enacted on the Linux VM’s.
Next let me login to the VM and see if we really did change the hostname :), ohh yess! we did
I hope you enjoyed this blogpost on to manage “Linux DSC PowerShell” and found it useful, and i also hope it helps you out with your PSDSC ramblings.






so far so good