VMware NSX Edge Load Balancing
VMware NSX Edge Load Balancing – In this blogpost we would look at the benefits of why we need load balancing and also look at how to configure it in an NSX edge using GUI and PowerShell / PowerNSX.
Load Balancer’s –
Load balancers are used to balance load within an application and also provides kind of High Availability ( If any one of the server goes dead, LB decides and sends the request to next available server).
Lets take a scenario of a Web Application which consists of 3 WebServers, the Load balancer here balances out the load based on the resource availabillity it can do a round-robin / based on the resource availability, servers with least activity and send out the request to the appropriate server.
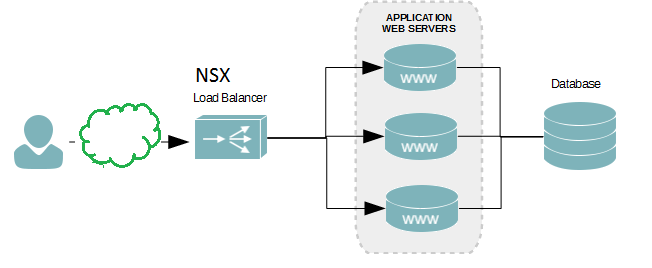
As you can see in the figure above, the users who try to access the Web application are redirected to a VIP or an Virtual IP Address of the Load Balancer, once the request is received, the LB decides which VM out of the three shown above needs to take up the request.
Now lets look at how configure it in NSX. head over to the NSX Edge and click on the Load Balancer tab and create a Pool and add members to the pool which would be load balanced (Web servers), you can also select the Algorithm type for load balancing.
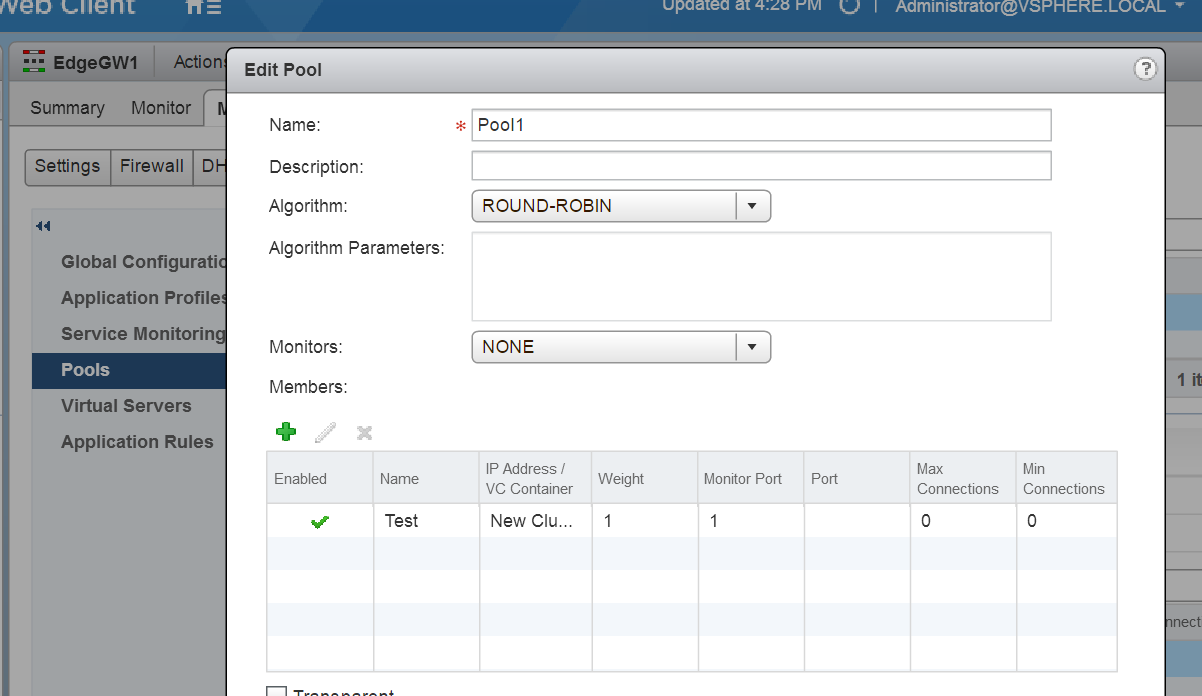
Once you create the Pool, next you would need to create the application profile by heading over to the Application Profiles Tab.
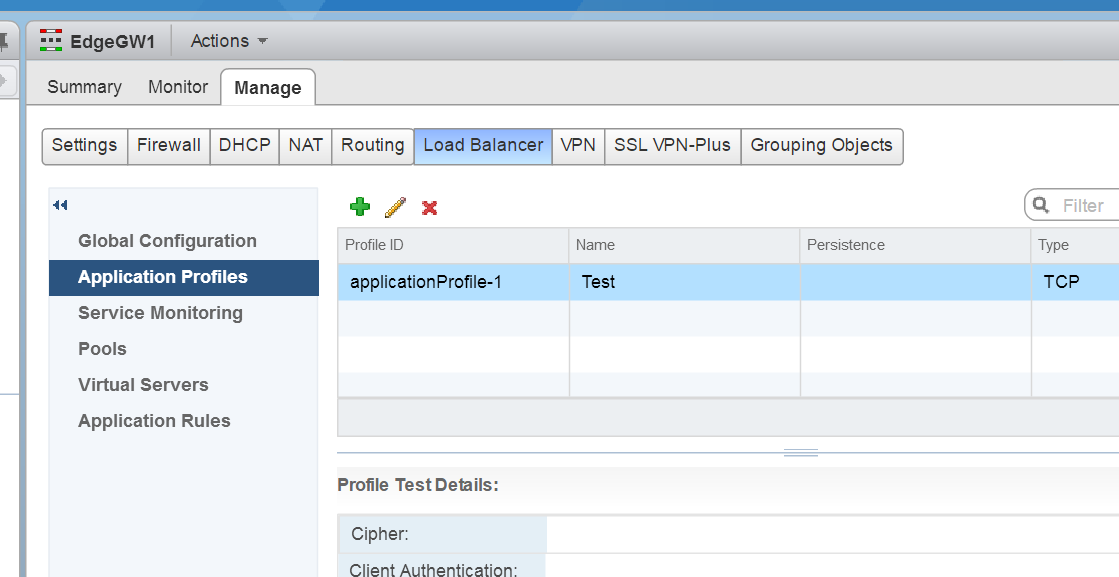
Next create the Virtual server which defines the VIP. This VIP needs to be given to the users so that when they try to access the Web application they type in this IP and automagically 🙂 the LB decides which of the web servers the traffic needs to be sent too.
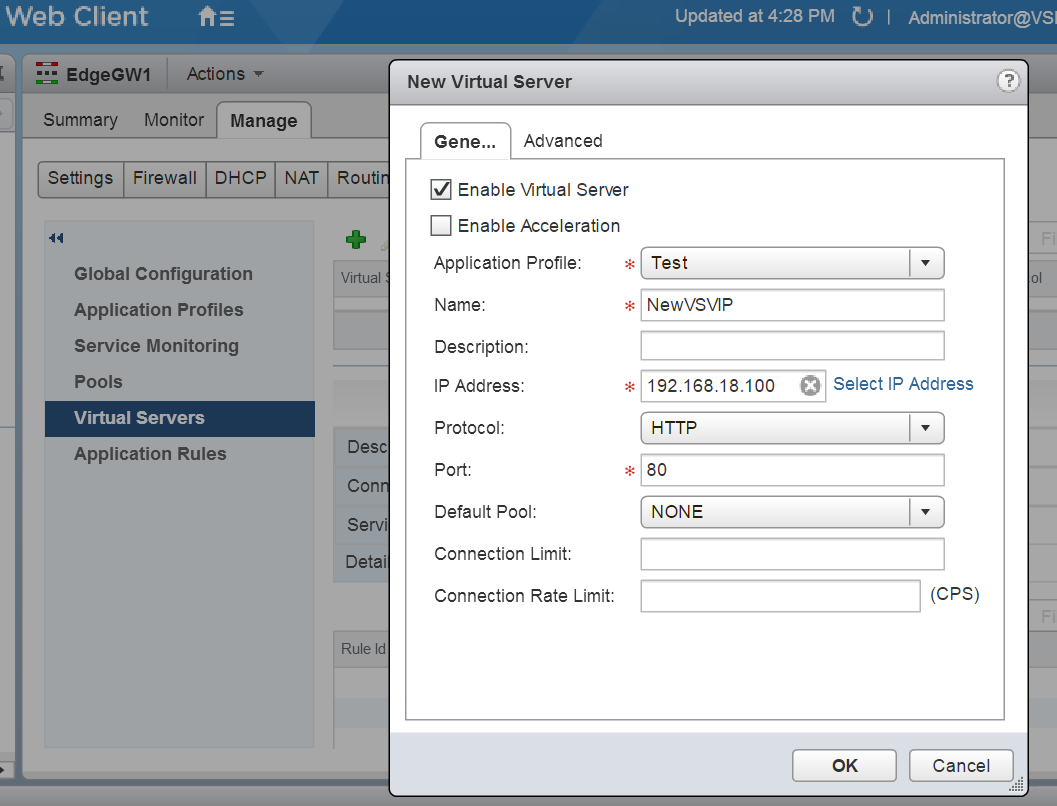
continued..
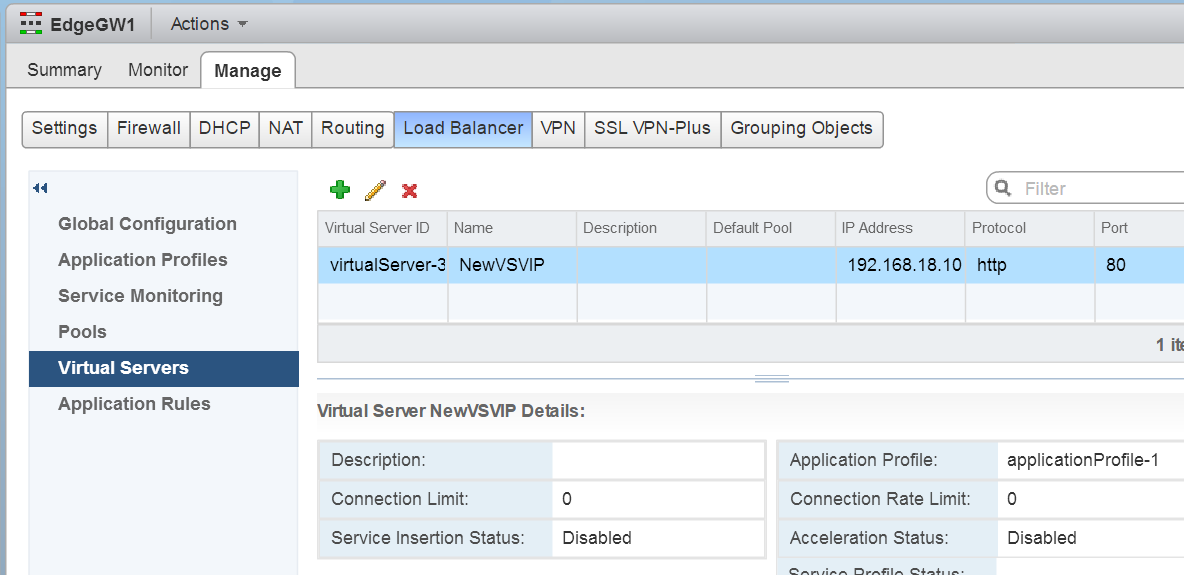
Next lets see how to automate this via PowerNSX.
As you can see PowerNSX has loads of cmdlets to automate NSX Loadbalancer related activities.
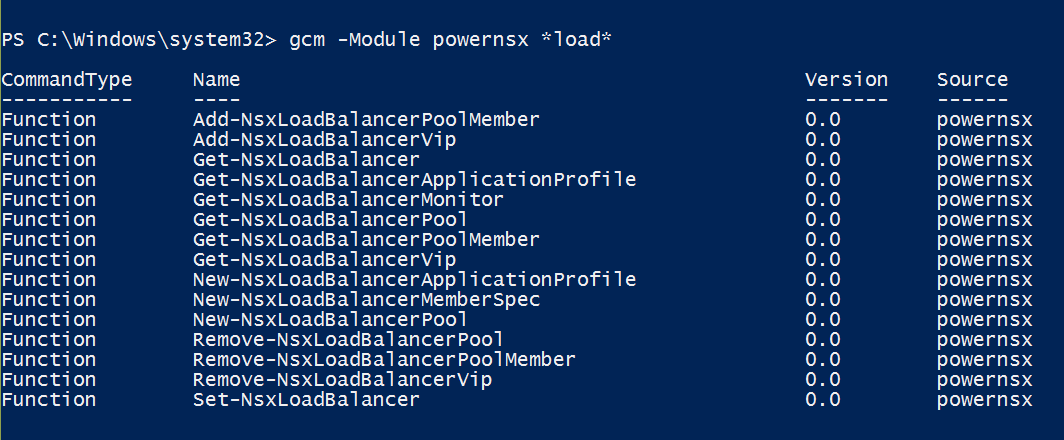
To enable NSX load balancer, you will first need to use the Set-NsxLoadBalancer cmdlet.
![]()
Next lets create the Pool and also add members, for this you would need to use the New-NsxLoadBalancerPool cmdlet, the help for this cmdlet speaks for itself, use similar way to create yours and also add members.
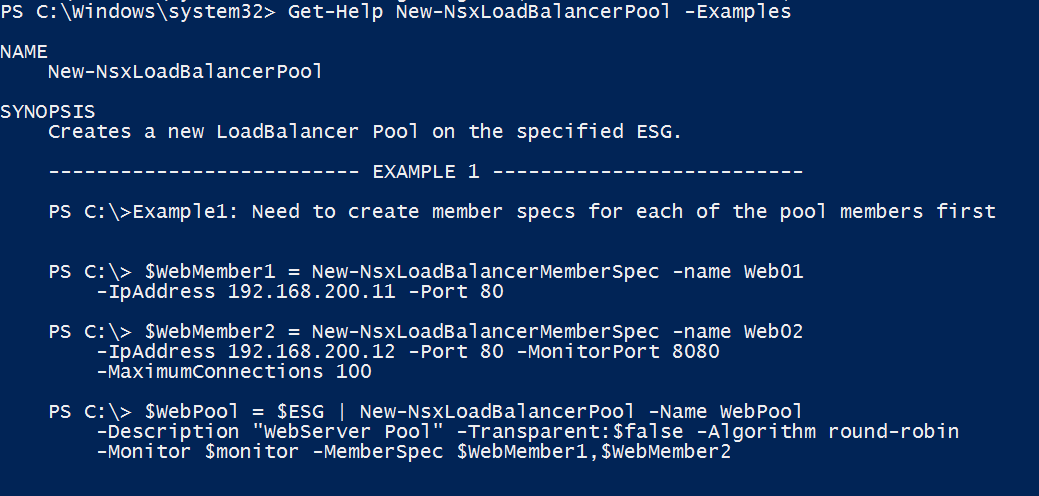
Once this is done, we need to create an application profile, you would need to use the New-NsxLoadBalancerApplicationProfile cmdlet to create this.
Then we have the final step of creating the Virtual Server VIP which can be done via Add-NsxLoadBalancerVip cmdlet, here’s an overview of the cmdlet help for this.
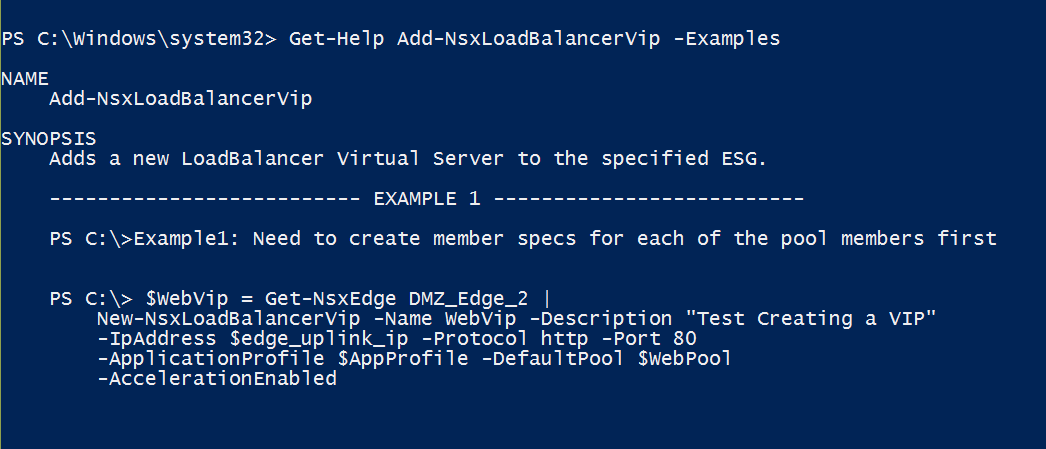
Some of the cmdlets in PowerNSX are missing out on examples, i had to do a bit of google and found an excellent script which showcases a 3-Tier-App-Deployment using PowerNSX created by NSX expert Anthony Burke.
I hope this blog was helpful and translates to some real world scenarios to use PowerNSX .
Do check out some of my other Posts on NSX
- VMware NSX PowerShell Installation and System Requirements Part-1.
- VMware NSX : Why we need it in SDDC.
- VMware NSX Components & Architecture
- Vmware NSX Controller Cluster creation using PowerShell
- VMware NSX Logical Switch and DLR config GUI-API
- Getting Started with PowerNSX
- VMware NSX Edge Static vs Dynamic Routing – PowerShell Config
- VMware NSX Edge SNAT vs DNAT – PowerShell Config


