Provision Software Components on Azure VMs with vRA 7.3
Hello Folks, With the advancement in technology in vRealize Automation , now with the release of v 7.3 we now have the capability to provision software components on the provisioned VM’s in Azure.
There is a nice blog by Daniele Ulrich which showcases how to do this for Linux VM’s, well i thought let me create a similar blog for Windows VM’s too.
So here we go, most of the points till we create the CentOS Tunnel VM on Azure and similar VM on on-prem remain the same.
For more details on the steps have a look at the below link which refers you to the official documentation
Configure Network-to-Azure VPC Connectivity
Let me go through a step by step process on how i configured this
I created two blueprints which deploy a CentOS VM both in Azure ( The Tunnel VM) and next On-Prem (The CentOS VM in local network)

Also remember to set the expiry and destroy parameter to never in the blueprint as you dont want these VM’s which establish a tunnel in between your Azure and On-Prem environment to be deleted 🙂
Once the Azure VM has been created, lets assign a Public IP address to this virtual machine, this is a new action which comes OOB with vRA 7.3 and allows you to assign a public ip to a VM, The pre-requisites for this needs you to create a pool of public ip address’s in Azure.
Once you click on the CentOS Azure VM, you would see a day 2 action to assign an public ip address
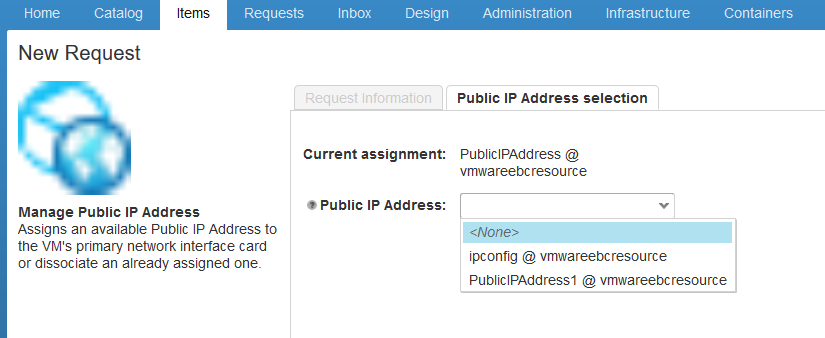
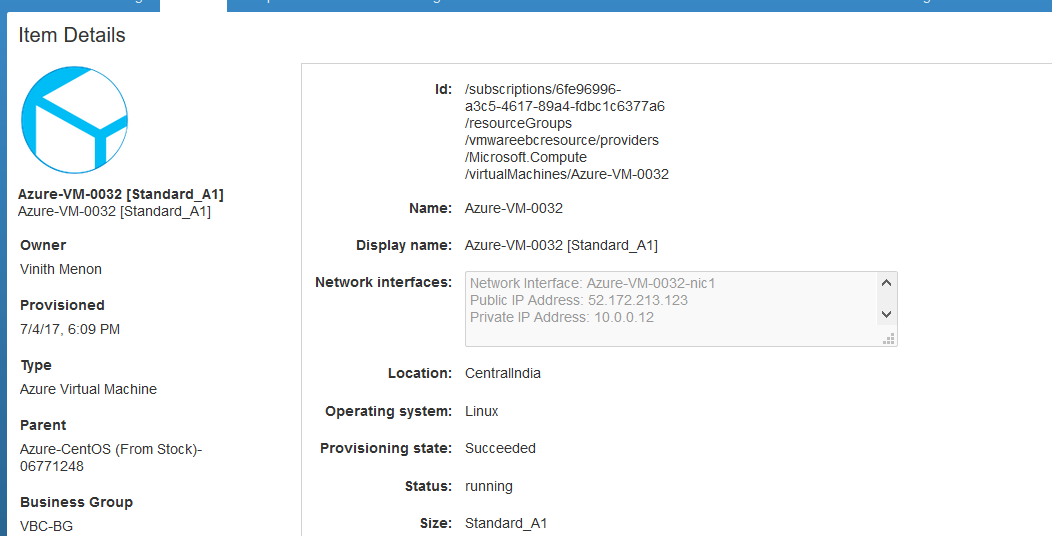
Just select the public ip address which shows up in the drop down box and click on submit and once the request finishes you would be able to see the VM is assigned with a public ip.
Next ssh into the Azure Cent OS VM and follow the below steps and restart the SSDH service
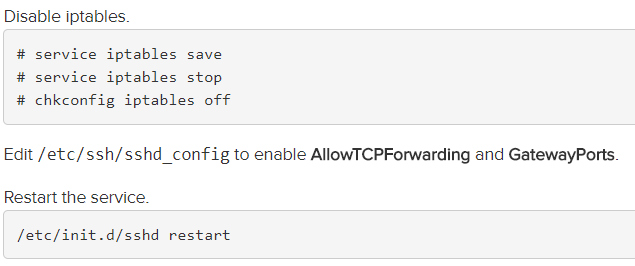
Note – In Cent OS 7 and above you need to use systemctl to restart the service, stop the ip tables service ( i saw that the ip tables was disabled by default as the service was not loaded)
![]()
systemctl stop iptables
systemctl restart sshd.service
Once these steps have been implemented on the azure centos tunnel vm, next lets head over to the CentOS machine on the same local network as your vRealize Automation installation as the root user and Invoke the SSH Tunnel from the local network machine to the Azure tunnel machine.

i saw that when i executed the able command double quotes was a problem hence i had to replace the double quotes with single quotes to make this work.
[root@CentOS-003 ~]# ssh -N -v -o 'ServerAliveInterval 30' -o 'ServerAliveCountMax 40' -o 'TCPKeepAlive yes' -R 1442:10.110.66.120:5480 -R 1443:10.110.66.120:443 -R 1444:10.107.174.116:443 vbcadmin@52.172.213.127
Also note there are two entries in this command, one where we enter the vRA Apppliance IP / FQDN
1442:10.110.66.120:5480 -R 1443:10.110.66.120:443
and the below entry where we enter the IaaS machine IP address
1444:10.107.174.116:443
Once you execute the above command you would be asked for credentials to the azure tunnel VM and once done you would have a successful tunnel endpoint established between on-prem and azure environment.
You would see something similar to the below once you have a successful tunnel established.
[root@CentOS-003 ~]# ssh -N -v -o 'ServerAliveInterval 30' -o 'ServerAliveCountMax 40' -o 'TCPKeepAlive yes' -R 1442:10.110.66.120:5480 -R 1443:10.110.66.120:443 -R 1444:10.107.174.116:443 vbcadmin@52.172.213.127
OpenSSH_6.6.1, OpenSSL 1.0.1e-fips 11 Feb 2013
debug1: Reading configuration data /etc/ssh/ssh_config
debug1: /etc/ssh/ssh_config line 56: Applying options for *
debug1: Connecting to 52.172.213.127 [52.172.213.127] port 22.
debug1: Connection established.
debug1: permanently_set_uid: 0/0
debug1: identity file /root/.ssh/id_rsa type -1
debug1: identity file /root/.ssh/id_rsa-cert type -1
debug1: identity file /root/.ssh/id_dsa type -1
debug1: identity file /root/.ssh/id_dsa-cert type -1
debug1: identity file /root/.ssh/id_ecdsa type -1
debug1: identity file /root/.ssh/id_ecdsa-cert type -1
debug1: identity file /root/.ssh/id_ed25519 type -1
debug1: identity file /root/.ssh/id_ed25519-cert type -1
debug1: Enabling compatibility mode for protocol 2.0
debug1: Local version string SSH-2.0-OpenSSH_6.6.1
debug1: Remote protocol version 2.0, remote software version OpenSSH_6.6.1
debug1: match: OpenSSH_6.6.1 pat OpenSSH_6.6.1* compat 0x04000000
debug1: SSH2_MSG_KEXINIT sent
debug1: SSH2_MSG_KEXINIT received
debug1: kex: server->client aes128-ctr hmac-md5-etm@openssh.com none
debug1: kex: client->server aes128-ctr hmac-md5-etm@openssh.com none
debug1: kex: curve25519-sha256@libssh.org need=16 dh_need=16
debug1: kex: curve25519-sha256@libssh.org need=16 dh_need=16
debug1: sending SSH2_MSG_KEX_ECDH_INIT
debug1: expecting SSH2_MSG_KEX_ECDH_REPLY
debug1: Server host key: ECDSA 92:ce:86:3c:cf:31:51:65:ac:ef:c9:e9:5e:b1:58:6e
The authenticity of host '52.172.213.127 (52.172.213.127)' can't be established.
ECDSA key fingerprint is 92:ce:86:3c:cf:31:51:65:ac:ef:c9:e9:5e:b1:58:6e.
Are you sure you want to continue connecting (yes/no)? yes
Warning: Permanently added '52.172.213.127' (ECDSA) to the list of known hosts.
debug1: ssh_ecdsa_verify: signature correct
debug1: SSH2_MSG_NEWKEYS sent
debug1: expecting SSH2_MSG_NEWKEYS
debug1: SSH2_MSG_NEWKEYS received
debug1: SSH2_MSG_SERVICE_REQUEST sent
debug1: SSH2_MSG_SERVICE_ACCEPT received
debug1: Authentications that can continue: publickey,gssapi-keyex,gssapi-with-mic,password,keyboard-interactive
debug1: Next authentication method: gssapi-keyex
debug1: No valid Key exchange context
debug1: Next authentication method: gssapi-with-mic
debug1: Unspecified GSS failure.  Minor code may provide more information
No Kerberos credentials available (default cache: KEYRING:persistent:0)

debug1: Unspecified GSS failure.  Minor code may provide more information
No Kerberos credentials available (default cache: KEYRING:persistent:0)

debug1: Next authentication method: publickey
debug1: Trying private key: /root/.ssh/id_rsa
debug1: Trying private key: /root/.ssh/id_dsa
debug1: Trying private key: /root/.ssh/id_ecdsa
debug1: Trying private key: /root/.ssh/id_ed25519
debug1: Next authentication method: keyboard-interactive
Password:
debug1: Authentications that can continue: publickey,gssapi-keyex,gssapi-with-mic,password,keyboard-interactive
Password:
debug1: Authentication succeeded (keyboard-interactive).
Authenticated to 52.172.213.127 ([52.172.213.127]:22).
debug1: Remote connections from LOCALHOST:1442 forwarded to local address 10.110.66.120:5480
debug1: Remote connections from LOCALHOST:1443 forwarded to local address 10.110.66.120:443
debug1: Remote connections from LOCALHOST:1444 forwarded to local address 10.110.66.120:443
debug1: Requesting no-more-sessions@openssh.com
debug1: Entering interactive session.
debug1: Remote: Forwarding listen address "localhost" overridden by server GatewayPorts
debug1: remote forward success for: listen 1442, connect 10.110.66.120:5480
debug1: Remote: Forwarding listen address "localhost" overridden by server GatewayPorts
debug1: remote forward success for: listen 1443, connect 10.110.66.120:443
debug1: Remote: Forwarding listen address "localhost" overridden by server GatewayPorts
debug1: remote forward success for: listen 1444, connect 10.110.66.120:443
debug1: All remote forwarding requests processed
Also note once you configure port forwarding to allow your Azure tunnel machine to access vRealize Automation resources, your SSH tunnel does not function until you configure an Azure reservation to route through the tunnel, and this is done by updating the properties in the Azure reservation.
Head over to the Azure Reservation you created in vRA and update the below properties so that the necessary API’s and JAR files in vRA appliance are accessible through the port forwarding done through Azure Tunnel VM.
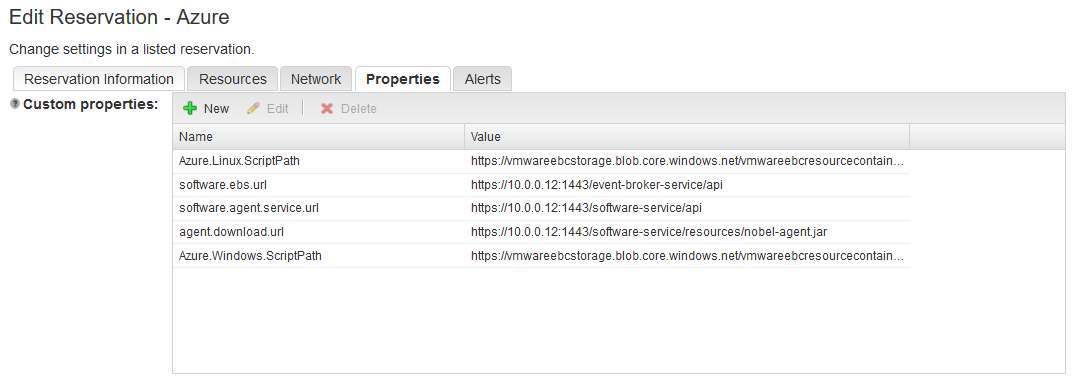
Azure Reservation Properties
Azure.Linux.ScriptPath - https://vmwareebcstorage.blob.core.windows.net/vmwareebcresourcecontainer/script.sh

Azure.Windows.ScriptPath - https://vmwareebcstorage.blob.core.windows.net/vmwareebcresourcecontainer/script.ps1

software.ebs.url - https://10.0.0.12:1443/event-broker-service/api

software.agent.service.url - https://10.0.0.12:1443/software-service/api

agent.download.url - https://10.0.0.12:1443/software-service/resources/nobel-agent.jar
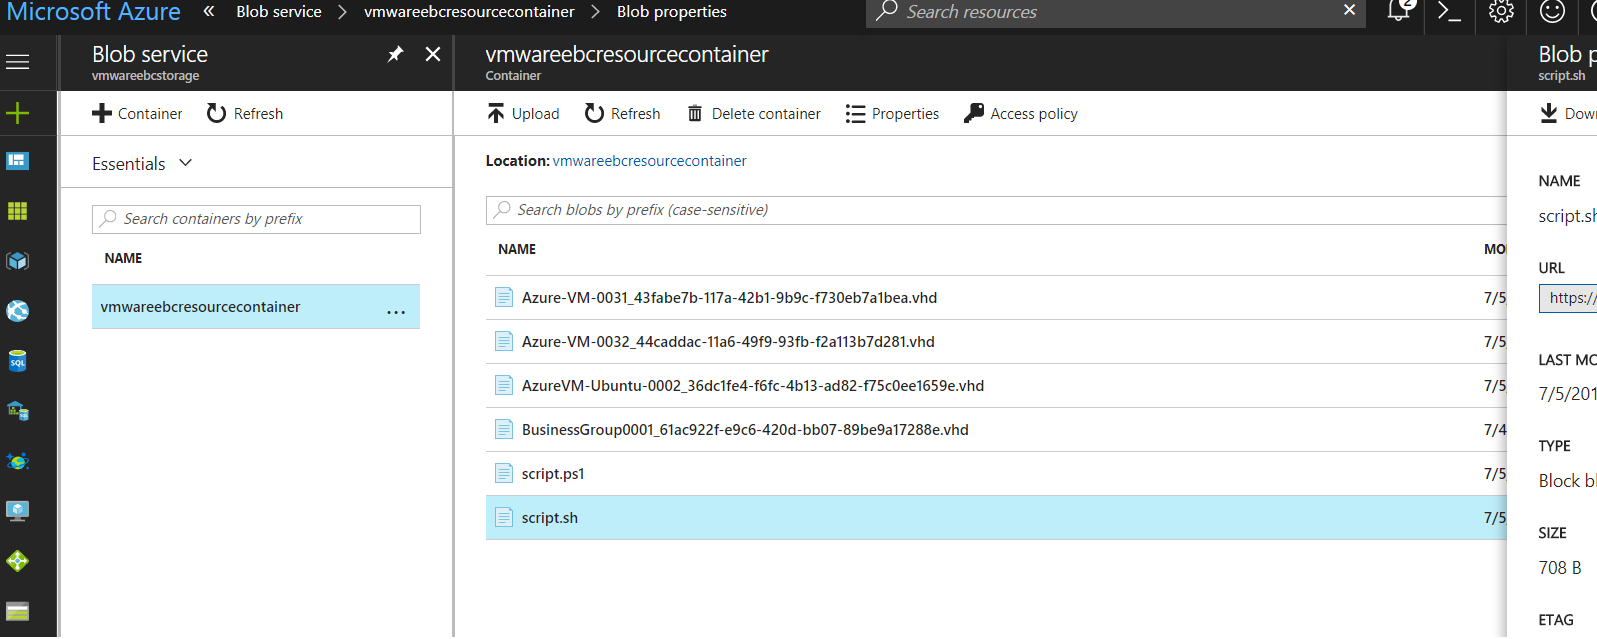
You will notice that i have kept the Azure Linux Script and the Azure Windows Script in a blob storage container so that the Azure VM once deployed can pick the scripts from here for Software Component install.
Here’s a view of the blob container where i upload the scripts.
Note – Next set of steps would be taking a deep dive to convert this VM to a template, before you provision the VM try to create the VM in a storage account of the type “Resource manager” as classic is not the way the world is moving towards, also i selected the replication type to Locally redundant storage.
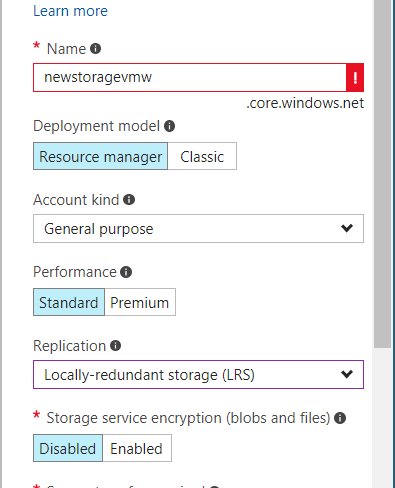
Also update the same storage account in the blueprint and the Azure Reservation.
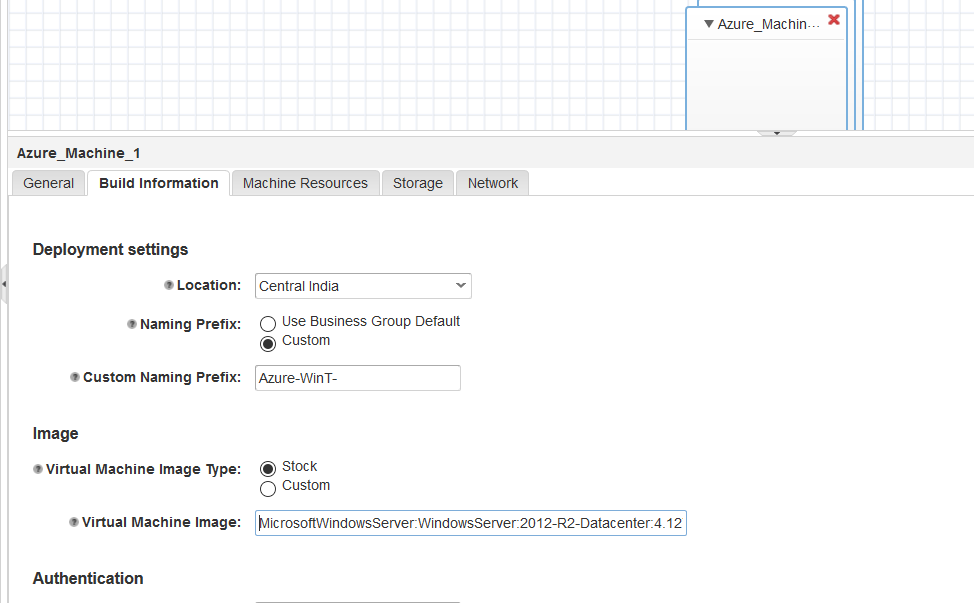
Here’s a view of the blueprint.
The image i used was Windows 2012 R2 Datacenter –
MicrosoftWindowsServer:WindowsServer:2012-R2-Datacenter:4.127.20170406
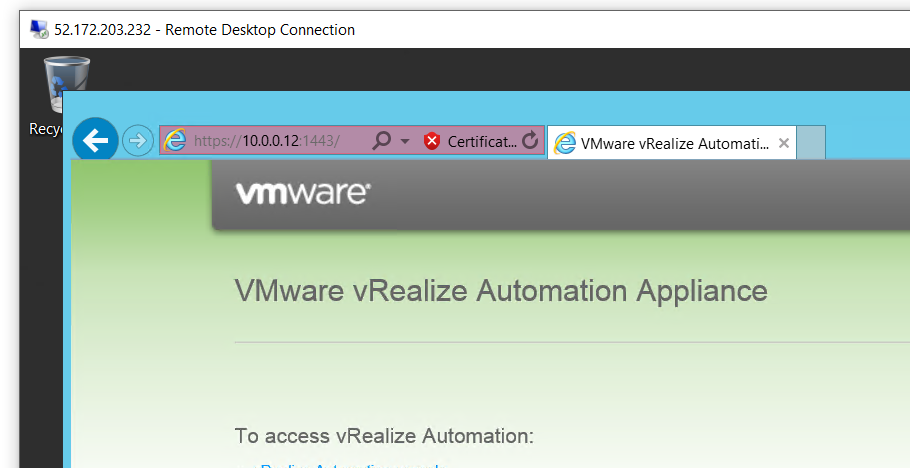
Ok once these steps have been completed, lets provision an Azure Windows VM, assign a public IP to it and voila!, you would see we can access the vRA Appliance via the Tunnel VM.
Next lets execute the Prepare vRA template script to prepare this VM as we usually do it On-Prem

Also note before execution of the script, edit the PORT options in the script for the Appliance and Manager Service to the one we set on the Tunnel VM.
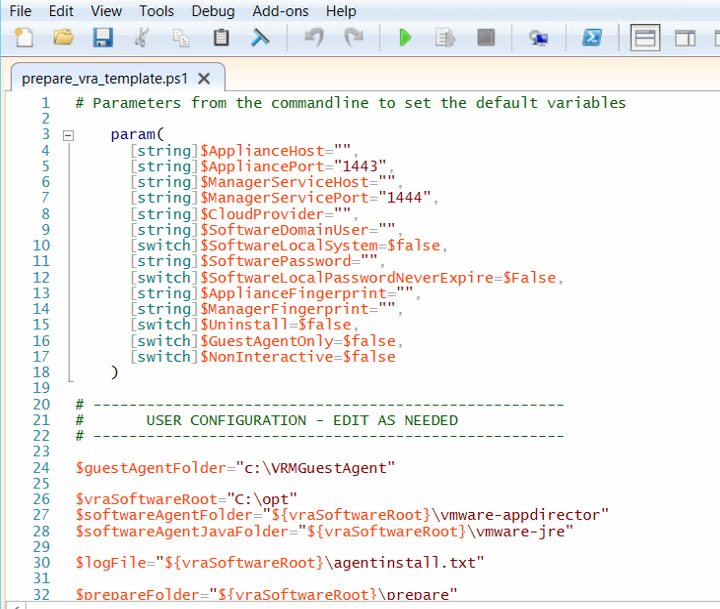
Next lets execute the script.
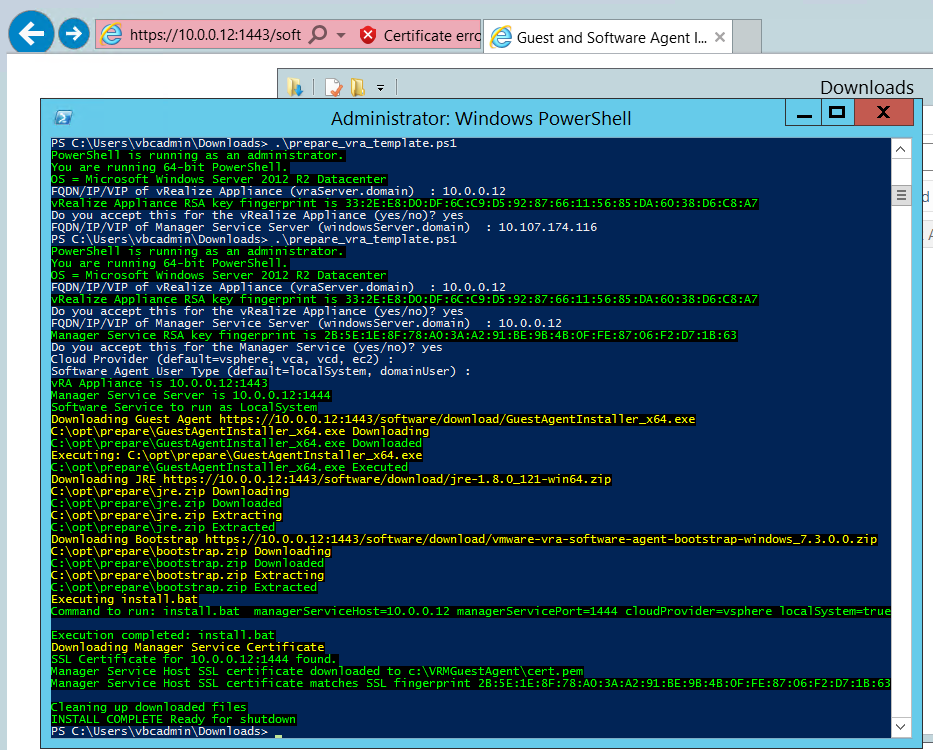
Once you see it is successful, next lets go through the steps to convert this VM to a template.
The Official Steps can be found here
Import the Azure module, stop the azure VM and set the VM to generalized


Next lets create the Azure Image config and create the azure Image

Once the above steps are completed, you would see that the Template is created in Azure, copy over the Blob URI
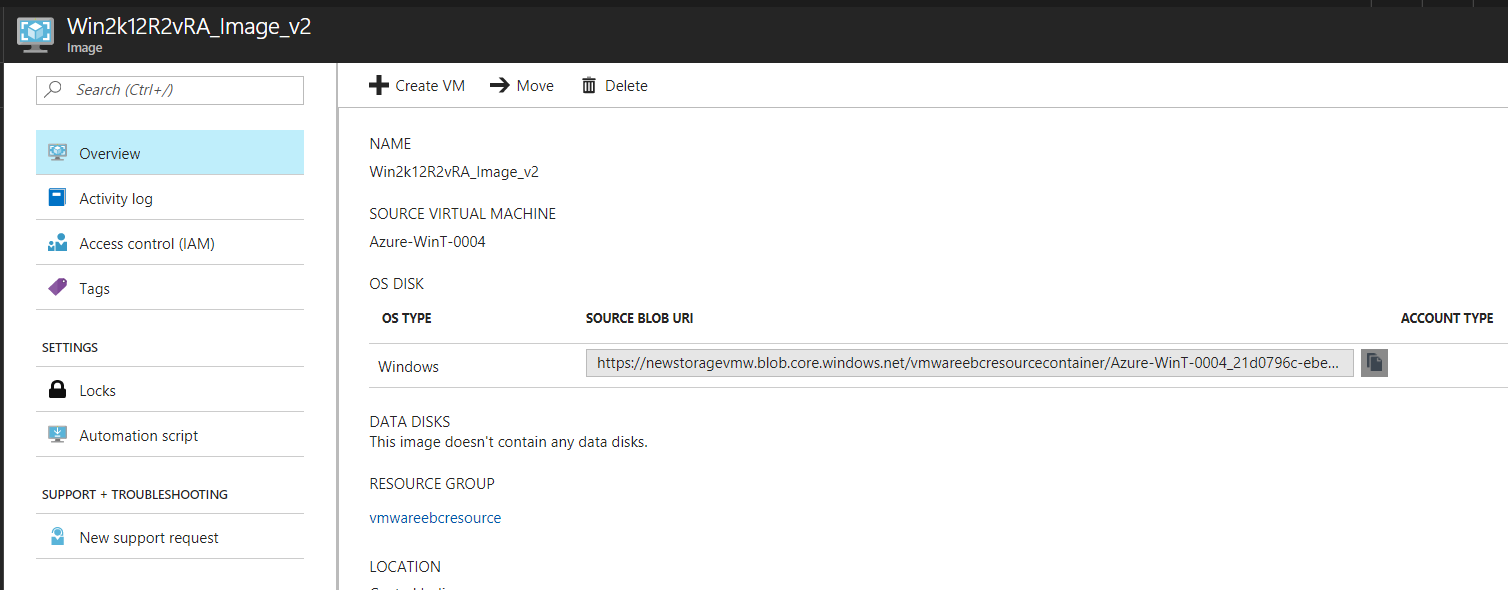
Duplicate the existing the Azure Windows blueprint and update the Virtual Machine Image to this Blob URL
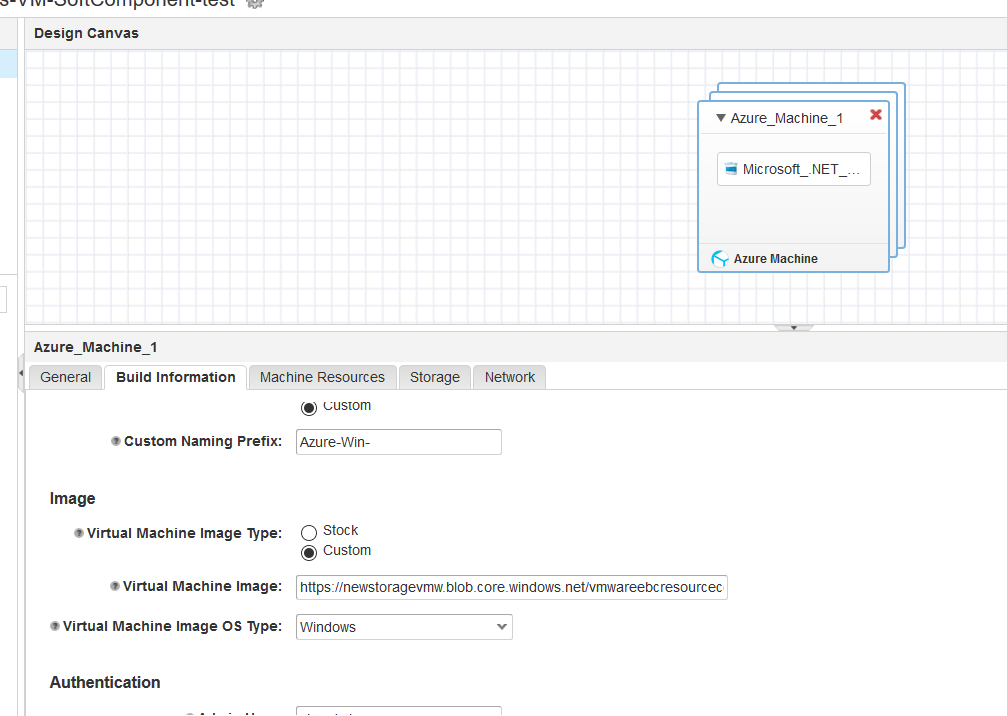
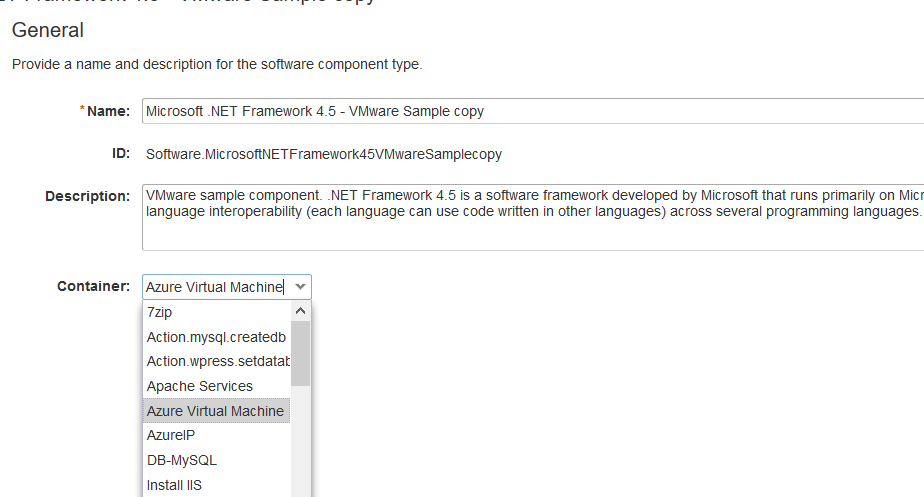
You would also see i have dropped a software component on the Azure VM, to make this possible you would need to duplicate the existing Soft Component / create a new one with the Container Type as “Azure Virtual Machine”, as the existing vSphere one’s cant be dragged and dropped onto the Azure Machine Container.
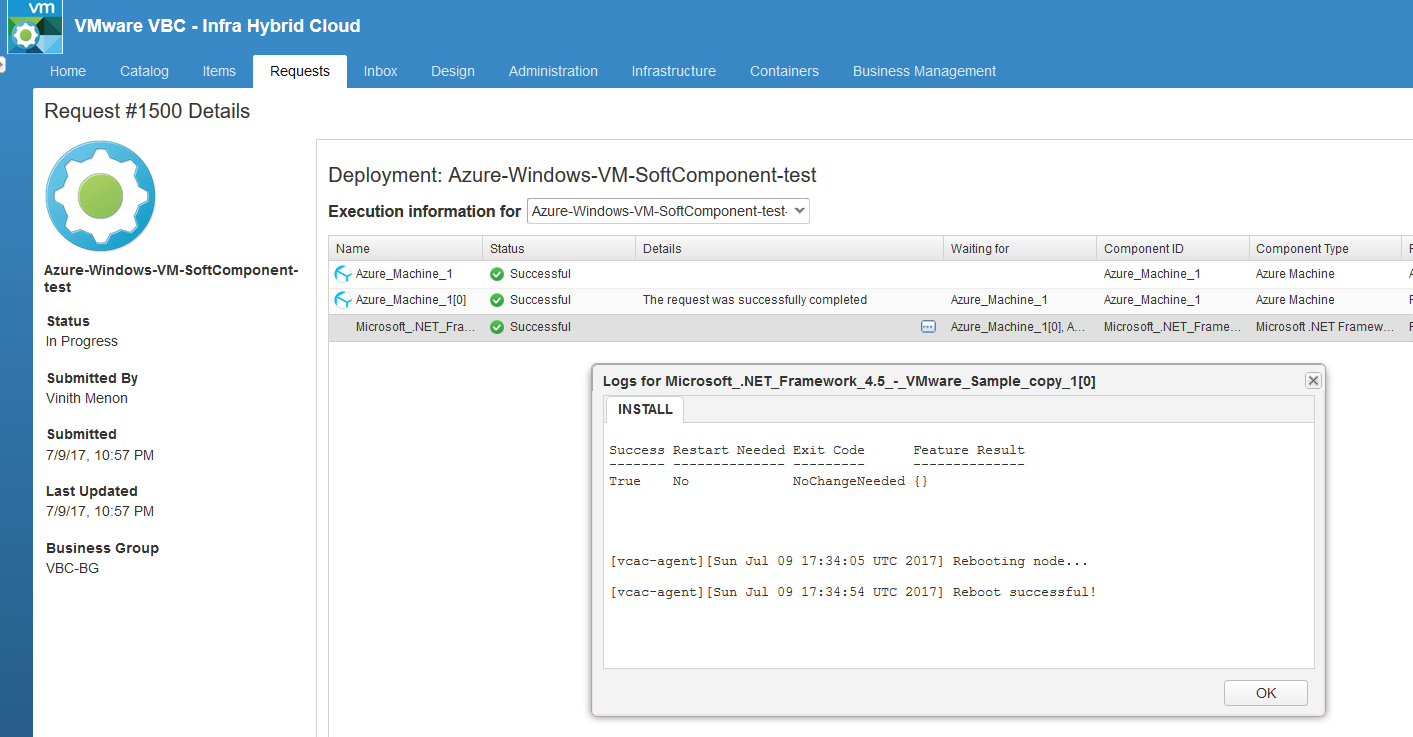
We are all good now 🙂 , Once you Publish this blueprint as a catalog item you would see we are successfully able to provision software components on the windows machine.
This was just a sample!, think of what can be achieved with this incredible technological development in vRA 7.3
I hope you enjoyed this blogpost and found this information useful! 🙂


Pingback: Eye on VMware 08/07/2017 | VMware News and Update